Like many other hosting providers, HostGator hosting offers shared, VPS, and dedicated hosting plans. Although there are HostGator hosting packages for WordPress, there are no solutions for ecommerce, and shared hosting can hardly work for Magento and WooCommerce sites.
Unfortunately, such an approach to web hosting leaves no options for business owners who do not want to suffer from limitations that shared HostGator hosting plans impose, but at the same time are not ready to move to VPS and dedicated hosting. Having your own server often requires you to spend hours configuring and optimizing the production environment or even hire a dedicated team.
In this guide, you will learn how to transfer your online business from HostGator hosting to Nexcess to leverage all benefits of hosting optimized for WordPress and ecommerce.
Nexcess Cloud and dedicated hosting as perfect solutions for WordPress and ecommerce
In the web hosting industry VPS and dedicated hosting plans have been considered an alternative to shared hosting for years. However, when your website has outgrown the amount of hosting resources offered by shared hosting plans, you are expected to rent a server and configure the production environment according to your needs. The concept of managed VPS and dedicated hosting does sound good. Still, in the vast majority of cases, unless you are an experienced system administrator, it will be challenging to configure all services to ensure outstanding performance and security.
The comparison part #1: HostGator hosting plans for WordPress and ecommerce
HostGator hosting offers two options — shared hosting for a fast start of your online business and VPS or dedicated hosting to upgrade to once your website has grown. For larger websites, you begin facing downtime and poor performance caused by a very small amount of hosting resources allocated to it. HostGator hosting packages leave you with no choice but to rent a server for your WordPress, WooCommerce, or Magento 2 website to control what kind of a web server and PHP handler you use, and how many processes you allow to run simultaneously to accommodate traffic.
Moving from shared to VPS or dedicated hosting is a huge step. In most cases, having your own server will create even more complications, leaving you alone with the need to address constant issues and constantly search for solutions to make everything work. However, WordPress, WooCommerce, and Magento 2 have been around long enough for experts to work out the best approach to hosting dynamic websites built on these platforms.
So why would you have to set up and configure the production environment using your own VPS or dedicated server if you can leverage the hosting platform that has already been configured to best suit the needs of your WordPress, WooCommerce, or Magento 2 websites?
The comparison part #2: Nexcess hosting solutions optimized for WordPress and ecommerce
The considerable gap between shared hosting and renting a VPS or a dedicated server led to the rise of Software as a Service (SaaS) platforms like Shopify. SaaS solutions are meant to address the limitations of shared hosting and eliminate all complications related to configuring your production environment. However, while SaaS solutions can be a great option, high transaction fees and almost no control over how your website works will make you think twice.
But what if you do not have to choose between free open source and proprietary software and shared, VPS, and dedicated hosting? Nexcess combines all the best from both traditional hosting and SaaS platforms.
Nexcess Cloud hosting provides an enterprise-level technology stack with the fully optimized infrastructure for WordPress, WooCommerce, and Magento 2 to ensure better performance and security. As a result, you can forget about having to suffer from the limitations of shared hosting or spend hours trying to maintain your server environment.
Nexcess allocates a minimum of 10 PHP workers per site on all plans, and the number increases as you upgrade, allowing your website to stay online 24/7 without worrying about it going offline in case of a traffic surge. Hosting a promotion? No problem — Nexcess Cloud auto scaling comes to the rescue, so you do not have to upgrade your hosting plan.
About the 3 ways to transfer your website from HostGator hosting to Nexcess
Cloud, dedicated, or high-availability enterprise hosting — Nexcess is ready to accommodate your needs. Let’s see how you can take your business to the next level by transferring your WordPress, WooCommerce, Magento 2, or any other type of website from HostGator hosting to Nexcess.
Once you have decided what type of hosting better suits your needs and created an account with Nexcess, it is time to move your websites to the new infrastructure. There are three ways to transfer your website from HostGator hosting to Nexcess:
- Nexcess Migration Services. All Nexcess plans provide access to Nexcess free migration services.
- Nexcess Migration Plugin. Migrate To Liquid Web & Nexcess is a WordPress migration plugin that makes transferring your WordPress or WooCommerce website to Nexcess easy and headache free.
- Self-Migration. You may choose to migrate your website from HostGator hosting manually. Nexcess will provide all means for it.
Transfer from HostGator hosting method #1: Nexcess migration services
Our migration professionals can help you transition from HostGator hosting to Nexcess fast and easily. We will handle the migration from start to finish, including data transfer and DNS updates, regardless of your website’s size and complexity. Fill in the Nexcess Migration Form from the Nexcess Client Portal, and a team of experts will start working on moving your business to Nexcess:
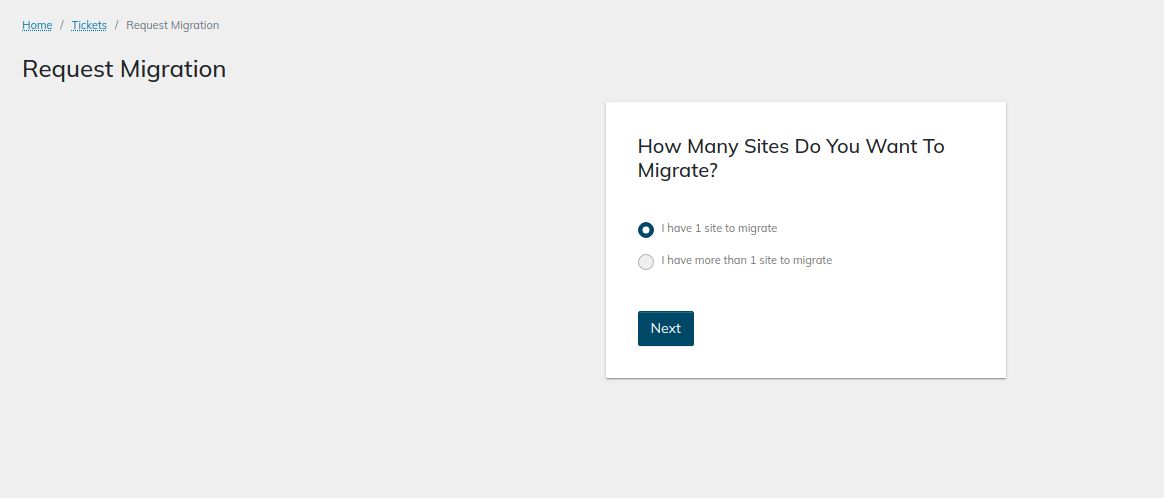
Timeframes for migrations will vary based on several variables, depending on the amount of data to be transferred and the time needed for you to test all websites from the new infrastructure. The time it takes for new DNS records to update across the Internet must also be counted in.
Migrations at Nexcess typically consist of three main phases:
- Initial Sync Phase. During the initial sync, we transfer all website data to Nexcess.
- Testing Phase. Next, we will turn everything over to you for testing. You will need to do a thorough check and report any errors or issues you may encounter back to us. Once you have confirmed that everything works correctly from the new infrastructure, we will initiate the final sync.
- Final Sync Phase. During the final sync, all data that has changed at Hostgator hosting since the initial sync will be transferred to Nexcess, and DNS records will need to be updated. Downtime is expected, as your website(s) will be completely inaccessible while we transfer data and new DNS records are updated across the Internet.
Transfer from HostGator hosting method #2: Nexcess WordPress migration plugin
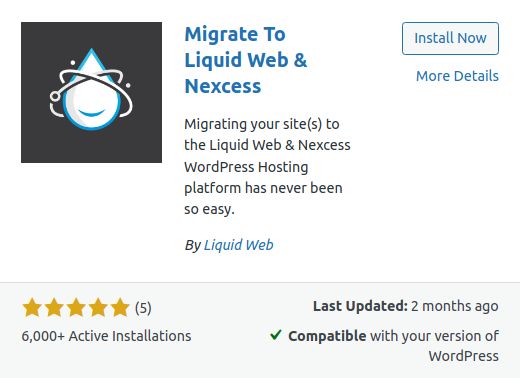
The Migrate to Liquid Web & Nexcess plugin makes the migration process much easier and allows you to transfer your WordPress website from HostGator to Nexcess within hours. The plugin takes care of all technical aspects of the migration process, from data transfer to making the necessary changes to your website’s configuration files:
Transfer from HostGator hosting method #3: Self-migration
No one knows your websites better than you, so if you would like to expedite the process, you can migrate all data from HostGator hosting to Nexcess manually. We will outline the main steps you need to take to migrate your WordPress, WooCommerce, or Magento 2 website from HostGator hosting to Nexcess.
The process includes having all your data backed up and downloaded from HostGator hosting and uploaded to Nexcess via FTP/SFTP or SSH. Please note that after the initial data transfer you will need to take a few additional steps. These steps ensure that any references to HostGator — including must-use plugins and configuration settings — are fully removed from your website to avoid any issues moving forward.
How to Transfer from HostGator hosting to Nexcess in 8 easy steps
Follow the steps below to transfer your website from HostGator hosting to Nexcess. The process is similar regardless of the Content Management System (CMS) in use.
Transfer a website from HostGator hosting to Nexcess step #1: Create a Nexcess account and choose a plan
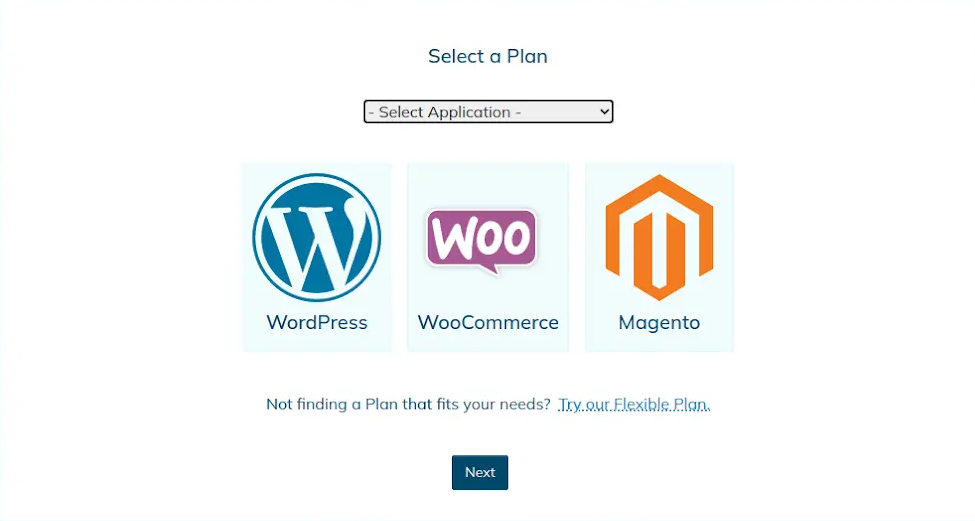
Create an account with Nexcess and choose a plan. Cloud hosting is a perfect solution for WordPress and ecommerce websites of any size and complexity. However, you can choose to have your own dedicated server or an enterprise hosting cluster.
If you have any difficulties trying to understand what plan best suits your needs and can benefit your business most in the long term, do not hesitate to contact our award-winning 24/7/365 technical support team for assistance:
Transfer a website from HostGator hosting to Nexcess step #2: Choose how to perform a website migration
Think about whether you would like to move all data yourself or leave it to us. If you choose to use our migration services, follow the steps covered in the previous section to submit a migration request. Follow the steps below to see how you can migrate from HostGator hosting to Nexcess without our assistance.
Transfer a website from HostGator hosting to Nexcess step #3: Turn your website off on the old server
Manual migrations can create additional complications, as transferring data in two phases is not always possible. Your website will have to be temporarily disabled to avoid losing any changes, including new orders submitted, comments, or even posts, while you move it to Nexcess and update DNS. You can suspend your website from cPanel on the HostGator hosting server, enable maintenance mode, or redirect all traffic to a custom maintenance page.
Transfer a website from HostGator hosting to Nexcess step #4: Move your website to Nexcess
Manually moving your website to a new server is a straightforward process, which includes having a backup of the site downloaded from the old server and uploaded and restored on the Nexcess side.
You can do it by downloading your website data, including all files and the database, from cPanel or directly from the server via SSH and uploading it to Nexcess. You can upload your files via FTP/SFTP or establish an SSH connection between the two servers and use the command line interface.
HostGator hosting uses cPanel as the hosting control panel available to its customers, so you can use cPanel File Manager and phpMyAdmin to obtain your website data. If you are familiar with the command line interface, transferring files over SSH is a great way to migrate all data fast and easily.
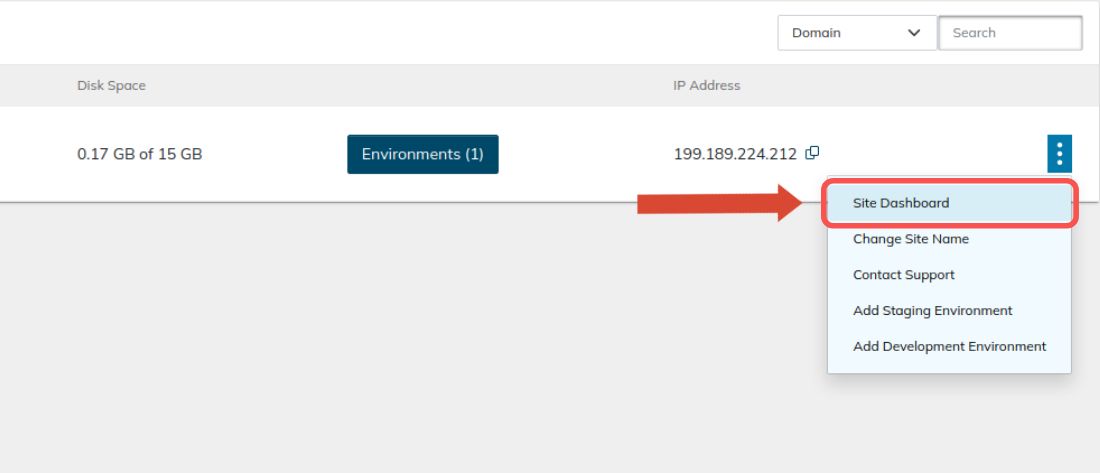
Once you create a plan and a new website with the chosen content management system, you can find your new website’s SSH and FTP/SFTP credentials by opening the Site Dashboard from the Nexcess Client Portal:
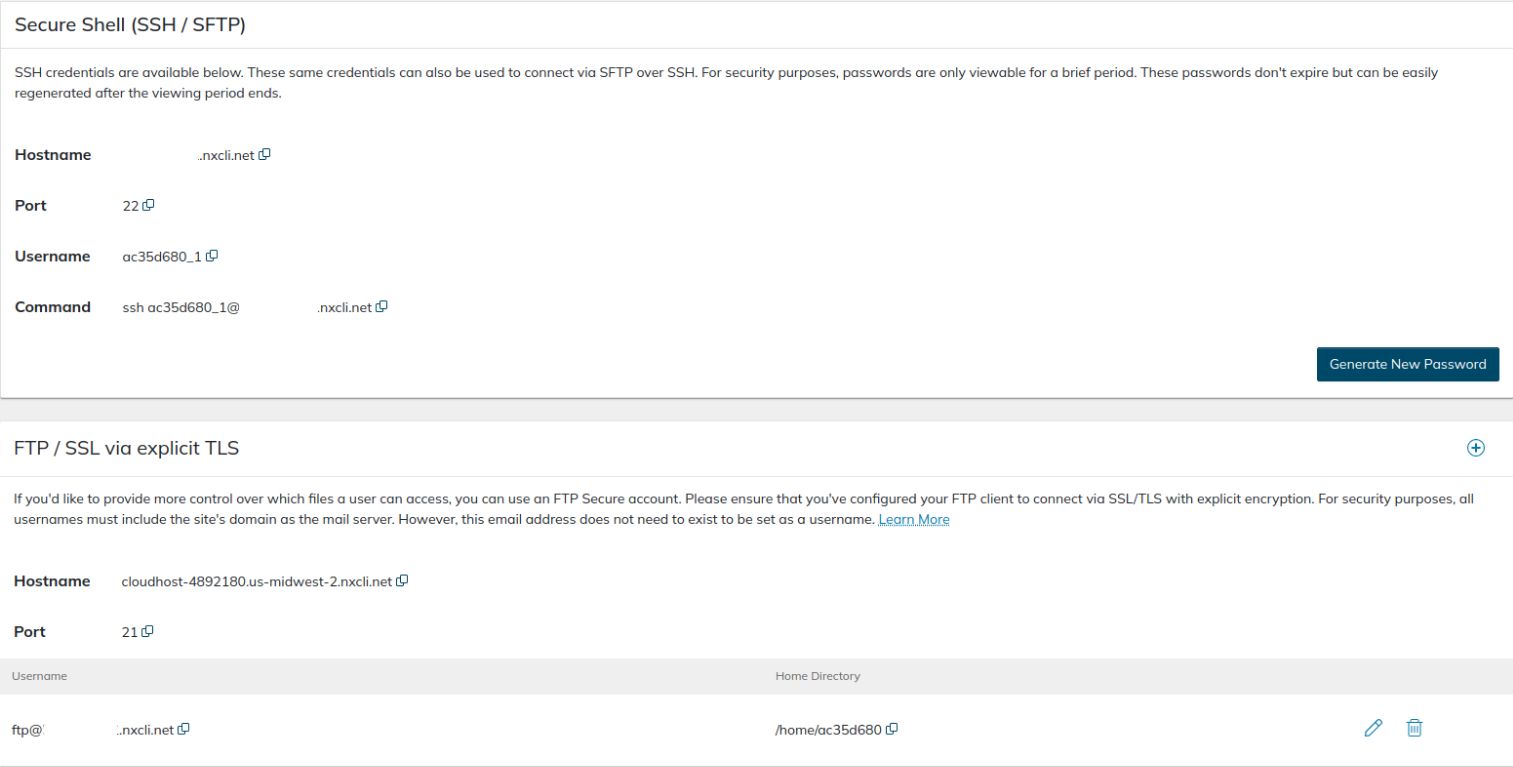
The Credentials tab will provide all usernames and passwords, as well as the new hostname and port numbers to use:
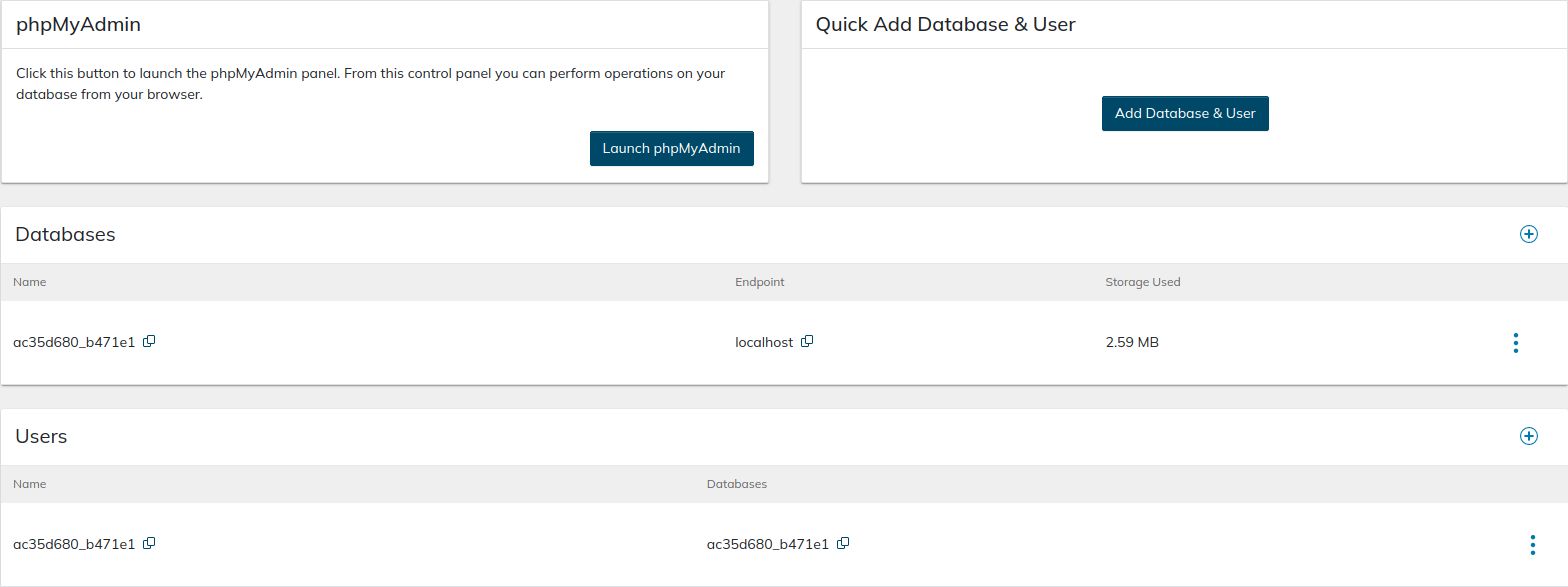
You can access phpMyAdmin to import your database and manage your MySQL databases in the Nexcess Client Portal by opening the Databases interface of the Site Dashboard:
Nexcess temporary domains and configuration changes
Nexcess uses temporary domain names to help make the migration process more convenient for you and provide a number of other benefits. For example, it allows you to test your website during the migration process without having to modify your host's file. Once ready to update the DNS, you can also use the temporary domain name assigned as a CNAME target.
If you have decided to migrate your WordPress website from HostGator hosting to Nexcess using the Migrate To Liquid Web & Nexcess migration plugin, use the temporary domain as the Destination Site URL and Server Address. Insert your Nexcess SFTP credentials retrieved from the Site Dashboard, and initiate the migration:

The migration plugin will take care of all technical aspects of the website transfer for you, so you do not need to adjust your website files or its database afterward. If you choose to transfer your website manually, you will need to take a few additional steps. You will need to have your website configured to use the temporary domain name before you can update the DNS and direct all traffic to Nexcess.
For HostGator hosting WordPress and WooCommerce websites, run the WordPress Command Line Interface (WP-CLI) commands provided below. Taking this action will remove any configuration settings and customizations that have been added to your website at HostGator:
wp nxmapps cacheflush--all
wp nxmapps migration clean
Modify the URLs in your website’s database — perform a search-and-replace command using WP-CLI for WordPress and WooCommerce sites transferred from one of the HostGator hosting packages or change the values stored in the core_config_data table in your Magento 2 database from phpMyAdmin.
Please review and adjust the database connection information stored in wp-config.php to ensure it has the new database name and user, as well as the correct prefix. The DB_HOST constant needs to be set to localhost most of the time.
Transfer a website from HostGator hosting to Nexcess step #5: Test your website from Nexcess
Test whether your website is working correctly from Nexcess. You can use the temporary domain to browse your website and ensure no functionality is lost. Most of the time, you will not encounter any issues if you have correctly imported all data and adjusted the database access information.
If something does not work as expected, and you cannot identify what is causing errors, our 24/7/365 support team will help you address all issues and verify that all data has been transferred correctly.
Transfer a website from HostGator hosting to Nexcess step #6: Update the DNS
Once you have confirmed that your website works correctly after having been moved from Hostgator hosting, you can update DNS to direct all traffic to Nexcess. It is the final step of the migration process which will make the website live from our side.
Using our Nexcess DNS
You can choose to keep your current nameservers or manage DNS from Nexcess. First, update your domain registration information to use Nexcess nameservers and manage DNS from the Nexcess Client Portal. If your domain name was registered with HostGator hosting and you are using their nameservers, this step is necessary to cancel your account with them.
Configuring IP address and a CNAME Target
You can find the new IP address and the CNAME target in the Nexcess Client Portal. Using a CNAME provides many benefits, so we strongly recommend adding it. Update your existing DNS zone or create a new DNS zone and add DNS records from the Nexcess Client Portal if you have updated your nameservers to the ones provided by Nexcess.
Updating your domain name
Open the Domains tab of your Website Management Panel and click on the Modify Master Domain button as shown below. Once you confirm the update, Nexcess will automatically replace the temporary domain name used with the domain name you provided in all database tables, so you will not need to do it manually from phpMyAdmin or by using the command line interface:

Transfer a website from HostGator hosting to Nexcess step #7: Transfer your domain name
You can transfer your domain from HostGator hosting or another domain registrar to Nexcess anytime. The process of transferring domains to Nexcess is easy.
Unlock your domain name, copy the domain authorization code, and confirm the transfer. Next, log in to your HostGator hosting portal and choose Domains from the left menu. Navigate to the domain name you need and click on More. Disable domain locking and save the EPP key.
Transfer a website from HostGator hosting to Nexcess step #8: Cancel your HostGator hosting account
Log in to your HostGator hosting portal and choose Hosting from the main menu. In the Hosting Packages section, navigate to the hosting plan you would like to cancel, and click the Manage link. Choose Cancel Package and confirm the cancellation. To cancel all services at once, you may need to contact HostGator via chat or phone.
Conclusion
When shared HostGator hosting packages no longer suit your needs, but you are not ready to move on to VPS or dedicated hosting, Cloud hosting by Nexcess is a perfect solution for your WordPress, WooCommerce, or Magento 2 website. Nexcess provides hosting for WordPress and ecommerce, and all plans are prepackaged with the best solutions to keep your website fast and secure — regardless of the size and the number of daily visitors.
Develop more reliable websites with Nexcess
We offer faster speeds, stronger security, inherent scalability, and trusted support.
When it comes to web hosting, you cannot settle for anything less than the best. Enterprise-level technology stack with the server environment fully optimized for the chosen content management system — Nexcess is ready to accommodate your needs regardless of your chosen hosting plan. So, check out Nexcess Managed Hosting plans to start today!
Do not settle for anything less than the best when it comes to web hosting! Reply on the advanced technology and reliability Nexcess offers with an enterprise-level technology stack, a minimum of 10 PHP workers on all hosting plans, best caching, and advanced security options. Not to mention, we have the confidence excellent uptime, a world-class 24/7 customer support team, and decades of experience.
Learning resources
To accompany out solutions, we supply many learning resources at via our Nexcess Blog and Nexcess Knowledge Base. Ramp up with us. Then, elevate your site performance as you partner with Nexcess for your online business presence.
Excellent customer service
At Nexcess, we offer excellent customer service to facilitate your ongoing success! Our support team may be contacted at support@nexcess.net or with a chat message or via a phone call (+1-866-639-2377) any day of the year. You may also leverage the Nexcess Client Portal to manage your support tickets.
Your growth is something we champion. Learn about how much we care when you come over to Nexcess hosting from HostGator hosting — with new vocabulary like "helpful humans" and "beyond support" to just mention a few terms.
Recent articles
- Transfer from InMotion Hosting to Nexcess hosting
- Transfer from Kinsta hosting to Nexcess hosting
- How to add a new web hosting plan to your Nexcess account

