If you’re using WordPress, you may come across meta tags when editing or posting to your site. Meta is an underlying description. Tags are customized for all types of content defined in the page's source code.
Meta tags help Google find your site. When search engines index your website, they collect information from the title, headings, content, and meta tags. Search engines compare the language in each of these sections and rank the website depending upon how the information matches.
WordPress doesn’t support meta tags by default, but meta tags can be added manually using theme template files or through WordPress plugins.
If you want to learn how to add meta tags to WordPress, jump ahead or just keep reading.
- What Are WordPress Meta Tags?
- How to Add Meta Tags to WordPress: 3 Methods to Try
- How to Add Meta Tags to WordPress Manually
- How to Add Meta Tags to WordPress Using functions.php
- How to Add Meta Tags to WordPress With a Plugin
- Quick Tips & FAQs on How to Add Meta Tags in WordPress
- Power Your WordPress Site With Fully Managed Hosting
Get fully managed WordPress hosting
Power your site with the industry's most optimized WordPress hosting
What Are WordPress Meta Tags?
A meta tag is a piece of HTML code with information about the website or specific web pages, such as the author, keywords, description, type of document, copyrights, and other core information related to your page. WordPress meta tags inform search engines or web crawlers what the page is about and provide the content that’s displayed in search engine results.
Meta tags are a basic and essential part of search engine optimization, otherwise known as SEO. Optimizing WordPress meta tags can help you rank higher in search results, which helps drive traffic to your website.
Meta tags are hidden in the code of your content, allowing search engines or web crawlers to read them. Search bots and web crawlers look for specific phrases or keywords, which helps them understand and organize your content. And it helps them serve your content to the right people who search for those keywords on Google.
How to Add Meta Tags to WordPress: 3 Methods to Try
Now, let’s discuss how to add meta tags to WordPress. There are two ways to add meta tags to your WordPress website. You can add meta tags manually by editing header.php or functions.php files, or you can add them with the help of WordPress meta tags plugins.
How to Add Meta Tags to WordPress Manually
You can add meta tags to WordPress by editing header.php using the following steps.
1. Find and Open the header.php File
Go to Appearance and click on "Theme File Editor."
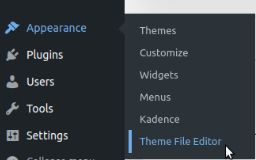
Click on the header.php under Theme Files to open the header.php file.

Note: You can also access and edit the header.php file from wp-content/themes/{YOUR_THEME}/header.php via FTP/SSH
2. Copying and Customizing Meta Tags
Copy the following generic code and fill it in with the keywords you’re trying to target. Place it under the <head> tag:
<meta name="keywords" content="keywords related to the content of the website" />
Then, copy the following generic description meta tag and paste it under the previous line:
<meta name="description" content="meta description for the content of the website" />
How to Add Meta Tags to WordPress Using functions.php
You can add meta tags to WordPress by editing functions.php using the following steps.
1. Find and Open the functions.php File
Go to Appearance and click on "Theme File Editor."

Click on functions.php under Theme Files to open the functions.php file.
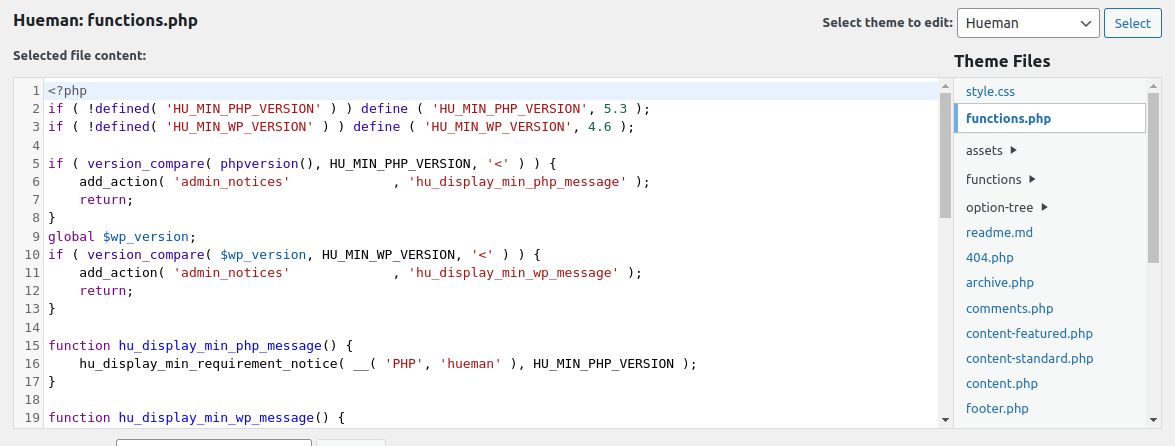
Note: You can also access and edit the functions.php file from wp-content/themes/{YOUR_THEME}/functions.php via FTP/SSH
2. Copying and Customizing Meta Tags
Add the following code to the functions.php file.
function hueman_add_meta_tags() {
global $post;
if ( is_singular() ) {
$des_post = strip_tags( $post->post_content );
$des_post = strip_shortcodes( $post->post_content );
$des_post = str_replace( array("\n", "\r", "\t"), ' ', $des_post );
$des_post = mb_substr( $des_post, 0, 300, 'utf8' );
echo '<meta name="description" content="' . $des_post . '" />' . "\n";
}
if ( is_home() ) {
echo '<meta name="description" content="' . get_bloginfo( "description" ) . '" />' . "\n";
}
if ( is_category() ) {
$des_cat = strip_tags(category_description());
echo '<meta name="description" content="' . $des_cat . '" />' . "\n";
}
}
add_action( 'wp_head', 'hueman_add_meta_tags');
In this article, we have added the hueman_add_meta_tags custom function, which will add meta tags to the different pages of your website. We have also used the wp_head hook to add meta tags to your pages. You can replace hueman_add_meta_tags with your own theme name.
How to Add Meta Tags to WordPress With a Plugin
If you are looking for a faster and easier way to add meta tags to your WordPress website, you can use WordPress plugins. Various options are available for those who want to add meta tags with plugins. You can choose the right plugin as per your requirements. Below, we’ll walk through three plugin options for adding meta tags to WordPress.
Yoast SEO
You can find the Yoast SEO section under any post or page you’ve edited once you activate the Yoast SEO plugin.
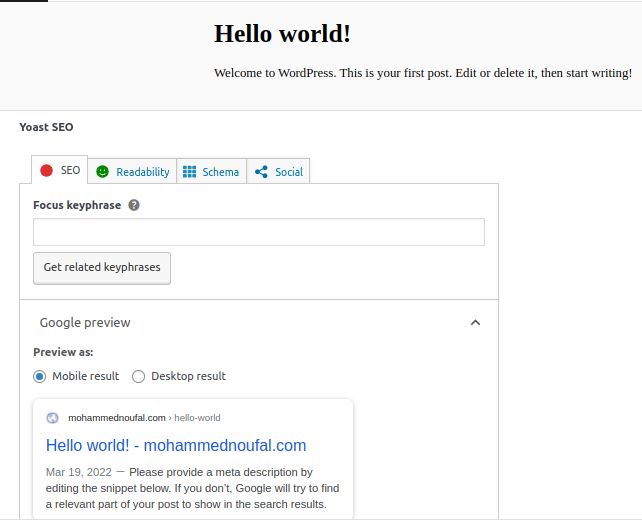
Yoast includes fields like focus keyphrase, SEO title, slug, and meta description.
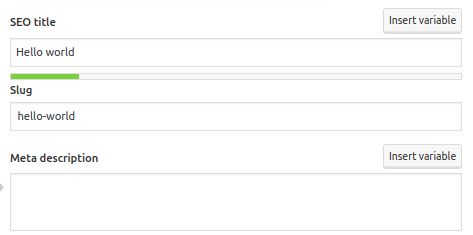
The focus keyphrase is the search term that you want your page to rank for. The SEO title is the page title. For better results, use your focus keyword in the page title and keep it under 60 characters. The slug is a part of your URL that describes the content of a page or post. The meta description appears under the page or post title on Google and provides information about the content.
All in One SEO (AIO SEO)
You can find the All in One SEO section under any post or page once you activate the plugin.
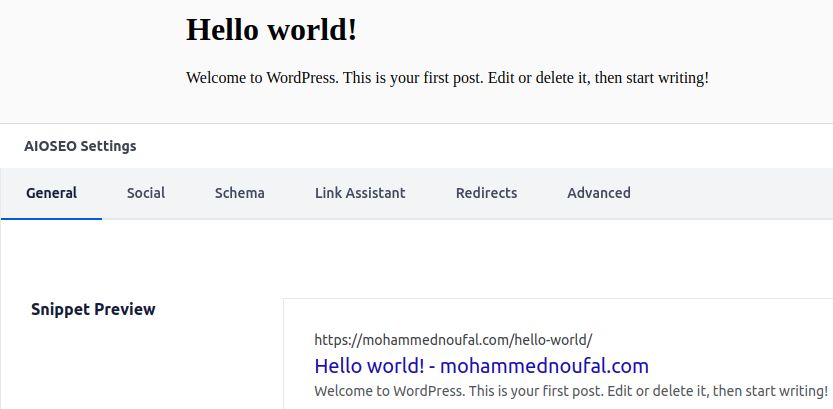
Fields such as post title, meta description, and focus keyphrase need to be filled out as per your requirements in the All in One SEO (AIO SEO) settings.

Meta Tag Manager
Once the Meta Tag Manager plugin is installed, you can access it at Settings > Meta Tag Manager.
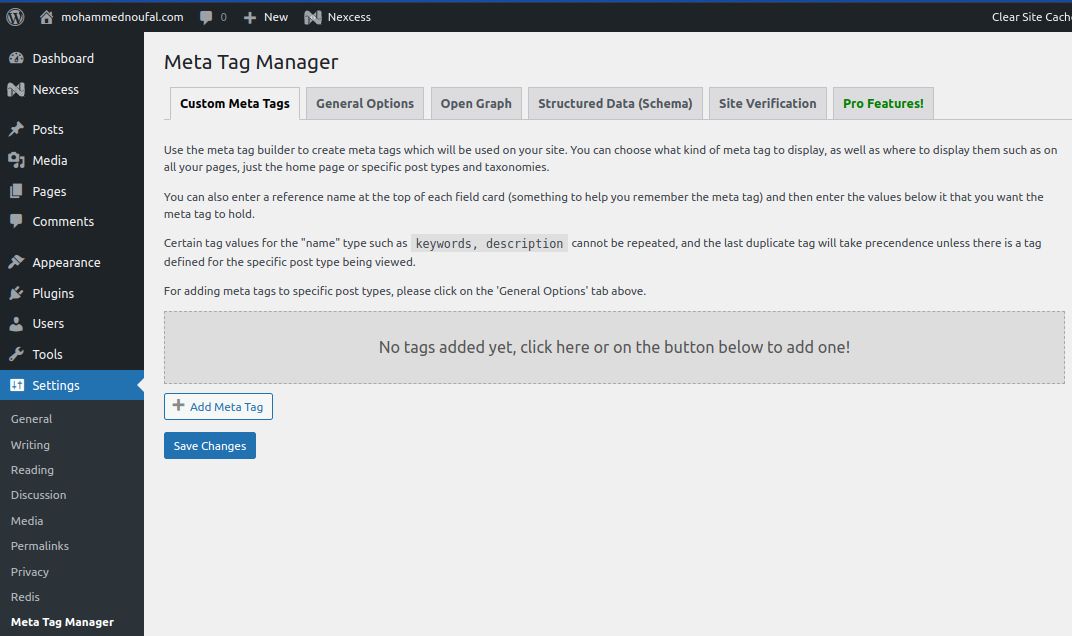
You can use Meta Tag Manager to add custom meta tags for specific pages, or you can enable meta tags for specific content types like page, media, and post.
To add the Meta Description Tag for the front page, go to Settings > Meta Tag Manager > Custom Meta Tags section. Click on the Add Meta Tag button, configure the meta description tag as shown in the screenshot, and then save the changes.
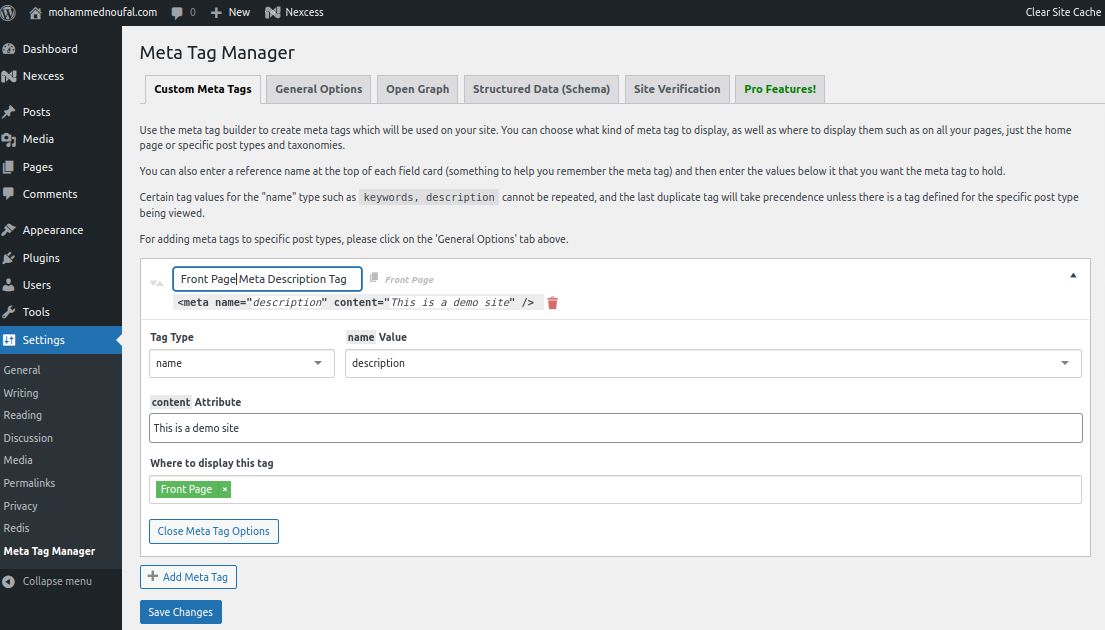
If you check the source code of your front page, you can see the following meta tag has been added by the Meta Tag Manager plugin.
<meta name="description" content="This is a demo site" />
You can add as many meta tags for your pages as per your requirements.
To enable the meta tag builder for specific content types, such as a post, go to the Settings > Meta Tag Manager and then click on General Options. Then select the posts content type and save your changes.

Now, create a new post and you can see the meta tag builder is added to it. Please refer to the screenshot.
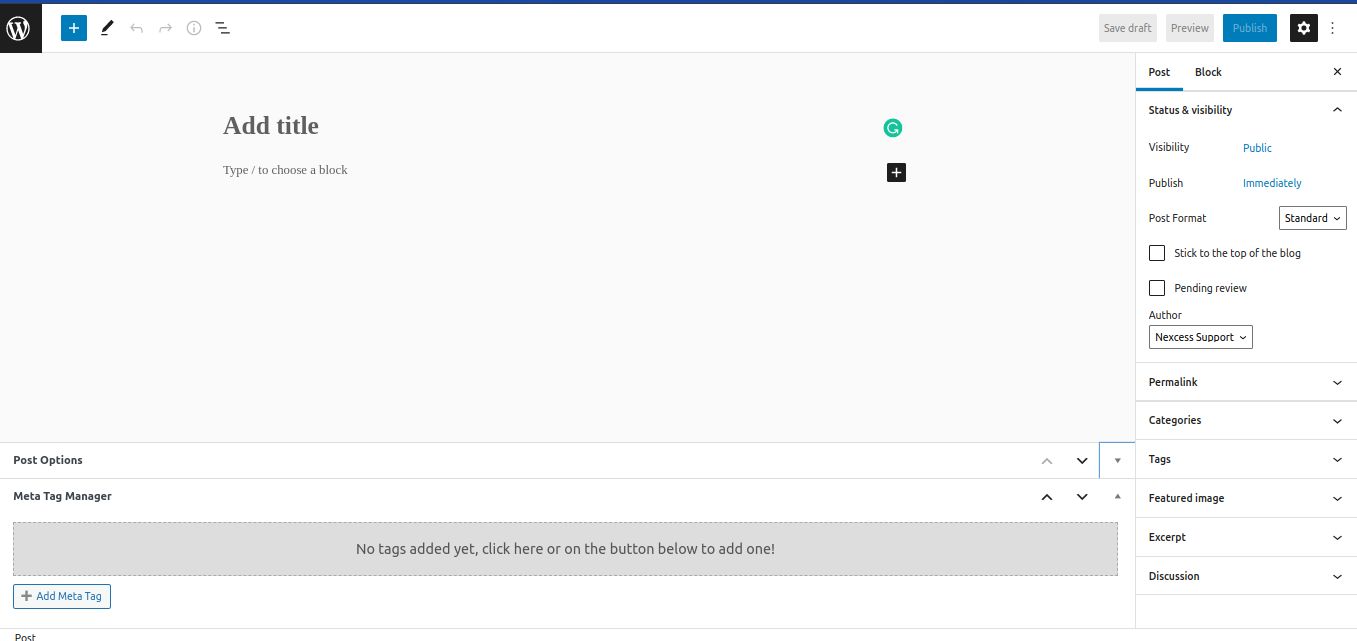
This way, you can use the meta tag builder for different content types.
Quick Tips & FAQs on How to Add Meta Tags in WordPress
Where Are My Meta Tags in WordPress?
To find meta tags in your WordPress site, look in your theme’s template files. Within those files, look for the <meta name> tag. If you’re using a WordPress plugin to add meta tags, such as Yoast SEO, look at the SEO Title and Meta Description fields.
How to Add Meta Keywords in WordPress
Go to the Meta Tag Manager under your WordPress settings. Click Add Meta Tag. From there you can add meta keywords and a description for any page or post on your site. Meta keywords can help people find your website on Google.
Are Meta Tags Included in WordPress By Default?
No, meta tags are not included in WordPress by default. It is up to you to add meta tags to your WordPress website. It can easily be done in your theme template files, or with a number of plugins.
How to Add Meta Tags in WordPress
It’s simple to add meta tags in WordPress. You can easily do so with a plugin. Just follow these steps.
- Log into your WordPress dashboard
- Search for the Meta Tag Manager plugin
- Install and activate Meta Tag Manager
- Go to settings > Meta Tag Manager
- Click “Add Meta Tag”
- Create custom meta tag types for different areas of your site
- Click “Save Changes”
Power Your WordPress Site With Fully Managed Hosting
If you are looking for a fully managed WordPress host with technical support, choose fully managed WordPress hosting by Nexcess. Its hosting is optimized for WordPress websites. That means a faster, more secure, and scalable website.
Our smart monitoring tools are built-in to help you keep it that way.
Check our Fully Managed WordPress Cloud Hosting to get started today.

