In this article, you will learn about the website migration process when transferring to Nexcess hosting from another hosting provider. As well, you will read about how to manually handle the website migration process for WordPress/WooCommerce or Magento sites, and how to use our nifty and super helpful website migration plugin for WordPress/WooCommerce sites.
Our migration service for web applications is free for those purchasing a paid web hosting offering at Nexcess. Our team will generally respond to a request for migration within 24 hours of submission. While we’re working around the clock to migrate sites, occasionally because of high volume, a queue may build up. This free service is on a first-come-first-served basis. While we cannot accommodate expedited migration requests, our awesome partner agencies that can help if you’ve got a tight migration deadline.
In addition, future potential Nexcess customers should be aware of the fact that Nexcess will buy out current web hosting contracts by issuing one-time payment of up to $1,000 to cover your fees.
Overview of the website migration process when moving to Nexcess hosting
Website migrations refers to transferring a website from one hosting provider to another. Here are some important related resources for getting started with the website migration process when moving over to Nexcess:
- Pre-migration checklist
- Getting started with managed WordPress and WooCommerce hosting
- Nexcess web hosting migration form explained
- Migrations — wow Nexcess handles websites infected with malware
- Introducing the easy-to-use Nexcess WordPress migration plugin
- What is a domain transfer? How to transfer a domain name
What is the website migration process?
At Nexcess, the website migration process involves moving all the website files, databases, configurations, and settings from the current hosting environment to a new one. There are several reasons why website migrations may be chosen:
- Performance and reliability
- Cost-effectiveness
- Better features and including free plugins and extensions
- Technology, including the application stack
- Outstanding customer support
- Scaling and growth
- Security enhancements
- Geographic considerations
Before initiating a website migration, planning the process carefully, ensuring backups are in place, testing the new hosting environment, and considering any potential impact on search engine rankings or existing integrations is essential.
Our premium migration solution is free for all managed Magento, WordPress, WooCommerce, or Flex plans purchased from Nexcess. Our migration services match your software version, keep your data intact, and provide a testing environment for your peace of mind, no matter how large or complex your site is. The Nexcess Migration Team is committed to collaborating with you to ensure an efficient and easy migration. The timeframes for each migration will vary depending on several factors. Any potential delays are minimized by maintaining regular communication with you to ensure we receive the required data to finish the process.
About the website migration steps when moving to Nexcess hosting
To use our migration support, you must submit a Migration request with appropriate details about the site being migrated through the Nexcess Client Portal by navigating to this link: Migration Request or follow the steps below:
- Once your Nexcess services are activated, log into the Nexcess Client Portal.
- Then, click the Support option on the left side of the screen.
- Next, click the Request Migration button in the upper-right section of the screen.
- Follow the three-step migration wizard and provide the required details about the site or sites that need migrating to Nexcess.
The sections that follow will help you gain insight into the website migration process. The overall migration project will also be influenced by various criteria, such as domain(s), storage requirements, bandwidth, etc.
Note that we do not support direct email migration outside Nexcess, but the customer can do so by following the instructions in this article, How to migrate an email account with IMAP.
How many sites do you want you migrate?
To get starting, choose an option based on how many sites you wish to migrate. If you only wish to migrate one site to our server, select “I have 1 site to migrate” radio button option and follow the three steps provided below.
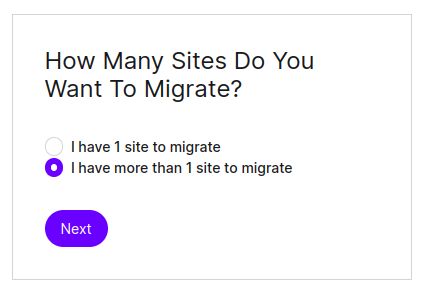
If you want to migrate multiple sites, select “I have more than 1 site to migrate” radio button and proceed with the steps under the "Multiple sites migration request" section further down in this help article:
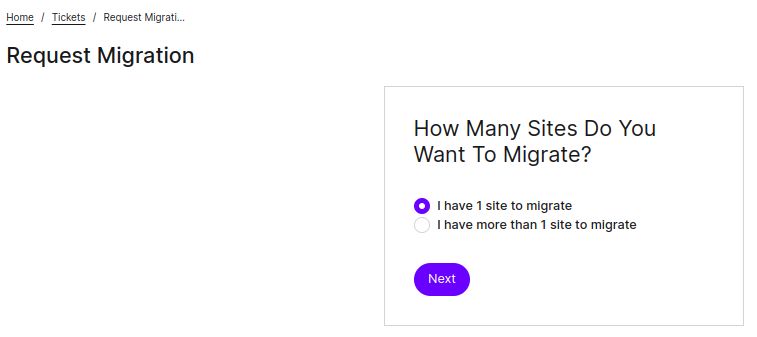
This information is necessary to plan for a migration. So, please confirm that your selected Nexcess product and plan will support all the sites you wish to migrate. The total number of sites that must be migrated should be the total number of sites that can be included within the plan.
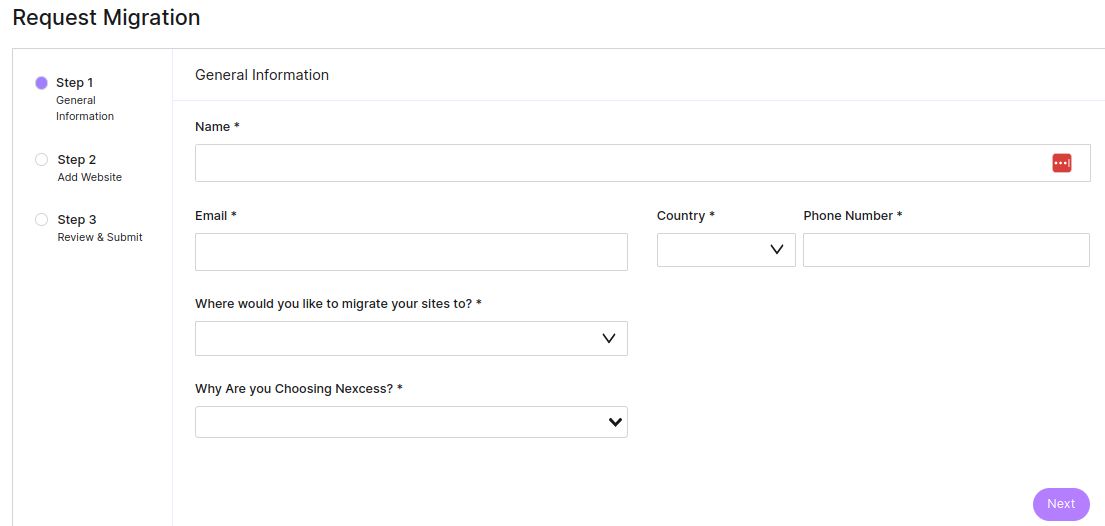
Single site migration request step 1. General information
We need basic customer information for this step, such as Name, Email Address, Country, Phone Number, Destination Nexcess Plan, and the Nexcess Features that best fit your needs:
Single site migration request step 2. Website information
2a. Website URL
In this step 2, you must provide the website name and the information related to the website to be transferred to Nexcess hosting:

2b. Where is the website moving from?
You can select your current website hosting provider from the dropdown menu:

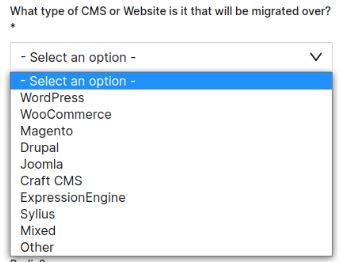
2c. What type of CMS or website is it that will be migrated over?
You can select the appropriate Content Management System (CMS) or website type from the list:
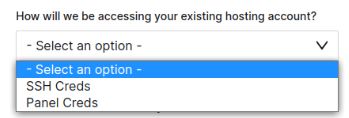
2d. How will we be accessing your existing hosting account?
You can choose how we access your existing hosting account:
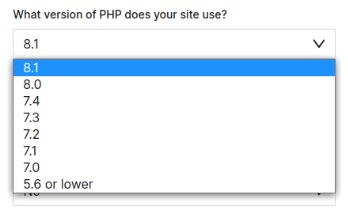
2e. What version of PHP does your site use?
You have the option of choosing the PHP version that your site will utilize:
2f. Is this a multisite/multistore?
If your site is multisite/multistore, you must provide us with the multisite configuration:

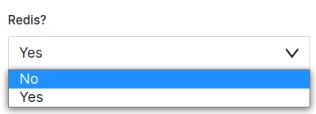
2g. Redis caching?
If the site uses Redis caching, select Yes; otherwise, select No:
2h. Outside files?
If the files are outside, you must provide us with the outside file location details:

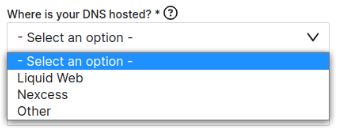
2i. Where is your DNS hosted?
You can select your Domain Name System (DNS) provider from the list. The customer must arrange the DNS change with the appropriate organization or entity if Nexcess or Liquid Web does not maintain the DNS.
DNS modifications made outside of our systems are not anything we can help with. You are responsible for updating the DNS records when it is time for your migrated site to go live:
2j. Do you need a final sync before the website go-live step?
The final sync is a scheduled activity with the migrations team to place your site(s) into maintenance mode when they bring over new information, such as new orders or files. You will then go live with the site after it has been re-synced.
The term "go live event" may also describe this. This final re-sync is only done when an initial sync has been performed and testing has been validated. This is not necessary if your migrated site(s) are static. If you need a final re-sync before you go live, you can choose Yes; otherwise, select the No option:

2k. Does your site have any special requirements?
You can provide us with any specific site requirements that need to be handled by our migration team:
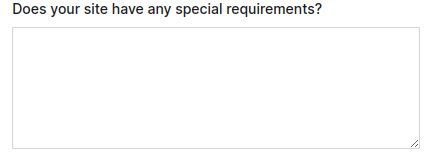
Warning! Do not enter any passwords or other sensitive data into this section — for example, usernames, passwords, SSH keys, and so on.
Single site migration request step 3. Review and submit
You can go on to the Review option at this stage and see the summary of the migration request form that has been submitted. When you click Submit, the migration details you provided are converted to a ticket, and our staff will use them to fulfill the migration request.
In most cases, our migration team will react to a request for migration within 24 hours of submission. While we work around the clock to migrate sites, queues may occasionally form due to heavy volume. Our free migration service is first-come, first-served, and while we cannot accommodate expedited migration requests, here's a list of our fantastic partner agencies that can assist if you have a tight migration deadline.
Multiple sites migration request
If you want to migrate multiple sites, follow the steps below.
Multiple sites migration request step 1. Select the multiple sites option
Select the “I have more than 1 site to migrate” radio button option and click the Next button:
Multiple sites migration request step 2. Enter Nexcess plan details
Enter your Email Address, Name, Phone Number, Country, Destination Nexcess Plan, and the Nexcess Features that best fit your needs:

Multiple sites migration request step 3. Download an empty spreadsheet file
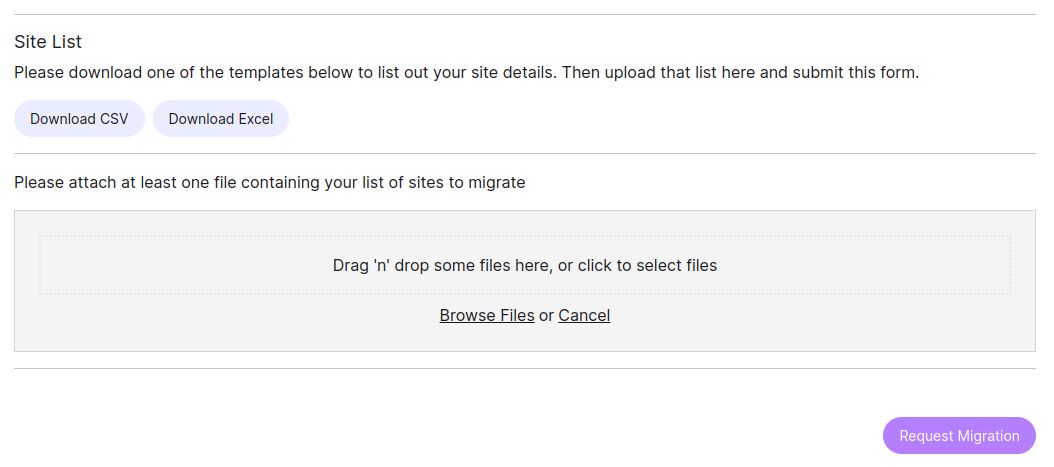
Download one of the spreadsheets templates provided in Microsoft Excel or CSV file formats to enter the details of your site.
Multiple sites migration request step 4. Upload the completed spreadsheet file
Then, upload the file containing your website list and click on the Request Migration button.
Multiple sites migration request step 5. Spreadsheet completion guidance
You must fill out the following columns in the provided spreadsheet (using the Microsoft Excel or CSV file format) for each domain:
5a. Site Name
5b. Source Information:
- Source Login URL
- Source PHP Version
- Source IP
5c. Source SSH Credentials:
- User
- Host
- Port
- Password
5d. Source Credentials (for admin panel access):
- Username
- Password
5e. Final Sync (if necessary)
Then, upload the spreadsheet file with the populated domain attribute fields:
How does Nexcess migrate your site?
The overall website migration process is divided into four stages:
Phase 1. Initial sync of the site from your old host to Nexcess.
Phase 2. Acceptance testing (that’s your part).
Phase 3. Final sync, which is a scheduled re-sync of the site from your old host to Nexcess (to catch anything that’s changed in the meantime).
Phase 4. DNS update to point the A record ("address record") to your new Nexcess server IP as the final website go-live step.
Phase 1. Initial sync
This part is the first of four migration stages. This step requires NO downtime. The new server receives a read-only copy of the data.
During this stage the following actions are involved:
1a. We analyze your website information and special requests to detect possible limitations.
1b. Collect data on server configurations, PHP versions, supported software versions, DNS settings, credentials, and SSH keys.
1c. Decide and test access levels.
1d. Perform version matching and install any special software mentioned in the form.
1e. Transfer the initial data seed for your migrated websites to the new server.
Phase 2. Review and acceptance testing
This phase is the second stage of the website migration process. Once the initial sync process is complete, we verify that all site content has been moved over and placed to ready the server for testing. The customer will be able to test and confirm the functionality of their websites on the new server at this time, and the most accurate approach to do so is by editing your hosts file. If customers encounter any issues or errors, they should respond to the ticket for the migration tech to assist in resolving any problems.
Phase 3. Final re-sync
The final re-sync of your site will include the complete copy of your database, new media, new plugin files and your active theme (email migration is not included). It will be the last data transfer in the website migration process. This phase occurs once the customer confirms that all testing has been finished and that no serious issues remain before the site goes live.
During the re-sync of your site on your old host, we will put your site into maintenance mode. This helps any new comments, form entries, customers or orders not get lost in the process of the re-sync being run. In most cases, a re-sync should be run so that there are not missing data elements or file issues after a site goes live. The reason why a re-sync would not be run would be if the site is not live and has not had any new data or file changes in it.
Since the original data move, the final sync often updates modified files, emails, and databases. This update is done with the source server no longer servicing requests and is most successful when combined with a DNS change. By responding to the migration ticket with the details, the customer can submit a request for scheduling the final re-sync at their most convenient time.
Phase 4. DNS update and the website go-live step
We want your transition to Nexcess to be as seamless as possible. If you have any questions during any part of the website migration process, feel free to reach out to our technical support team.
At this point, we are in the final stage in the website migration process. We can begin the DNS update once everything has been validated as good to go. The Nexcess migration support team will set a date to update the DNS and put the site online at a low-traffic time. If you want to schedule the DNS update more precisely for the most convenience, please respond to the migration ticket with the scheduling details.
For your information, if you can use the Nexcess name servers for the site domain, then it will be possible for the migrations team to change your A record during this website go-live step. If you are using other name servers, then you will need to be able to update your A host record for your site domain — or work with the party running and managing the other name servers to make the update required. Cloudflare is another good option for being able to easily manage your DNS records for your site domain.
Setting the Time to Live (TTL) value for the A host record to as low as possible will help the site go live faster:
"The TTL value of a DNS record represents the amount of time in seconds that DNS resolvers worldwide need to store the record in its cache. If you need to facilitate DNS propagation, lower the TTL value, setting it to 3600 (one hour) or less. Nexcess Client Portal defaults TTL to as low as 300 seconds (18 minutes) for each new record."
If you use Nexcess name servers for your domain, you can point the domain to our server yourself by following the steps in the following in the Pointing your domain at Nexcess DNS Services video tutorial:
Alternatively, you can refer the How to point your domain name to Nexcess DNS Services article to understand the steps involved. Of course, if you want, our team can assist you with updating the DNS with new server details through your Nexcess Client Portal.
How do you migrate your site manually?
Manual website migration process for WordPress/WooCommerce
You can migrate your WordPress/WooCommerce site manually from another hosting provider to the Nexcess server by following the website migration steps below.
Manual WordPress/WooCommerce migration step 1. Choose a suitable managed WordPress or managed WooCommerce plan for your site.
Manual WordPress/WooCommerce migration step 2. Back up your site’s files from the current hosting provider.
Manual WordPress/WooCommerce migration step 3. Back up your WordPress database from the current hosting provider.
Manual WordPress/WooCommerce migration step 4. Create a new database for the site via the Nexcess Client Portal and import the old database’s contents to the new database via phpMyAdmin.
Manual WordPress/WooCommerce migration step 5. Upload your site’s files to the Nexcess server via SSH or FTP using any FTP client (for example, FileZilla).
Manual WordPress/WooCommerce migration step 6. Edit your site’s wp-config.php file using new database details.
Manual WordPress/WooCommerce migration step 7. Change your DNS as appropriate from your name server's configuration area.
You can also migrate your WordPress/WooCommerce site to Nexcess using the WordPress migration plugin specifically developed for this purpose: Liquid Web & Nexcess WordPress migration plugin.
Manual website migration process for Magento
You can migrate your Magento site manually from another hosting provider to the Nexcess server from your side by following the website migration steps below.
Manual Magento migration step 1. Choose a suitable managed Magento hosting plan for your site.
Manual Magento migration step 2. Back up your site’s files from the current hosting provider.
Manual Magento migration step 3. Back up your Magento database from the current hosting provider.
Manual Magento migration step 4. Create a new database for the site via the Nexcess Client Portal and import the old database’s contents to the new database via phpMyAdmin.
Manual Magento migration step 5. Upload your site’s files to the Nexcess server via SSH or FTP using any FTP client (for example, CrossFTP).
Manual Magento migration step 6. Edit your site’s env.php file (for a Magento 2 site) or local.xml file (for a Magento 1 site) using the new database details. The file is under the location app/etc/ when navigating from your Magento root directory.
Manual Magento migration step 7. Modify the base URLs in your database. You can follow the guidance in the How to change Magento base URLs article to modify the base URLs.
Manual Magento migration step 8. Refresh your Magento cache and issue a reindex command:
- To refresh your Magento cache, you can refer to the How to flush your Magento cache help article.
- To issue the reindex command, see the How to issue a reindex in Magento (for Magento 1) or How to issue a reindex in Magento 2 articles.
Manual Magento migration step 9. Change your DNS as appropriate from your name server's configuration area.
In general terms, how long will the website migration process take?
Timeframes for each migration will vary based on several variables. Some factors that can impact this timing include the number of sites, size of the site(s), source, and your responsiveness to questions and acceptance testing. You should be knowledgeable how DNS records work.
Out of a sense of due diligence, you should verify that your DNS configuration was implemented correctly. During this process our free global DNS checker tool can be helpful.
Conclusion regarding the website migration process at Nexcess
This article was intended to help you better understand the website migration process when moving to Nexcess hosting. We hope it successfully increased your knowledge of our overall website migration process by reading this article.
Free website migration services
You shouldn’t have to work hard to migrate your site. That’s our job. Transfer your hosting with experienced, dedicated professionals.
If you require assistance with the transfer process or selecting a suitable hosting plan for your site before migration, don't hesitate to get in touch with our team.
Note about the original publication date
This article was originally published in November 2020. It has since been updated for accuracy and comprehensiveness.

