So, people often categorize Cloudinary as a Content Delivery Network (CDN), but is that the best description of this platform?
Let's take a deep dive to reveal the full picture of how a Cloudinary + WordPress platforms can interoperate to form a powerful and speedy web presence.
Cloudinary + WordPress — what is Cloudinary?
Cloudinary is a media platform that supports image optimization, video optimization, Digital Asset Management (DAM), media optimizer with image and video transformations. Thinking of Cloudinary as only a CDN provider would give you the wrong understanding of what it can be used for on your site with regard to overall media management and delivery optimization.
Cloudinary includes many integrations, such as Magento, besides the Cloudinary + WordPress integration plugin. Cloudinary would handle automatic optimization for images and videos uploaded on your site so that you do not have to worry about optimization being run using a plugin and service that can cause CPU and performance issues on your site’s server.
Using Cloudinary will help improve your website's performance and its conversion rate due to most sites using a number of images. For example, if your site images are slowing your site's performance down, then Cloudinary will help. In addition, since images and videos are being transformed and served without a loss of quality, using it will deliver users a faster front-end experience.
Cloudinary makes the image optimization process much simpler for your site and will then serve the images from the multi-CDN solutions that are provided in Cloudinary. In addition, Cloudinary comes with a built-in fast CDN so that you do not have to use a CDN provider with Cloudinary for serving out the image and video content on your site.
Site users expect a site to load within two seconds. If your site is slower that a few seconds, it will cause users to abandon it routinely.
Cloudinary + WordPress — how the Cloudinary works
Cloudinary will automatically sync images that exist in your site's WordPres media library along with new images being uploaded on your site to your WordPress account on Cloudinary.
Cloudinary + WordPress site setup step #1
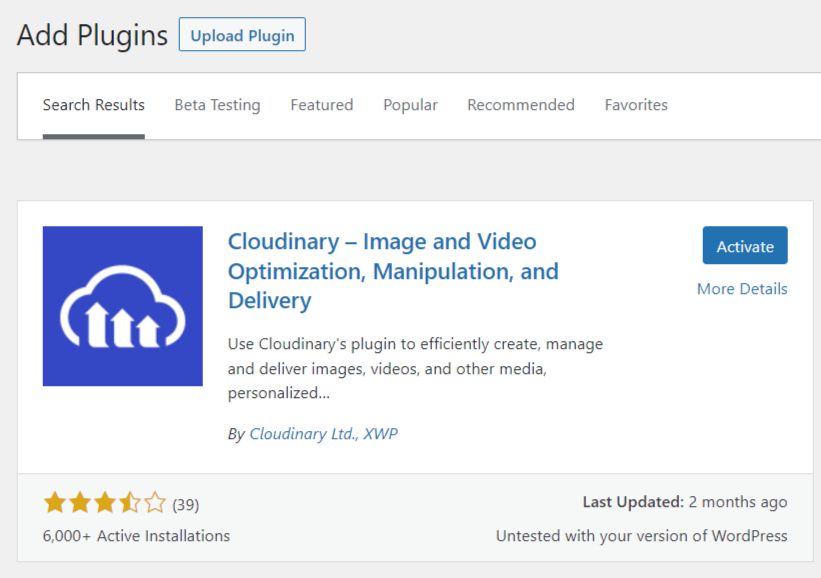
To be able to use Cloudinary / WordPresso solution your site, you will need to install and activate the Cloudinary WordPress plugin on your site and sign up for a Cloudinary account:
Cloudinary + WordPress site setup step #2
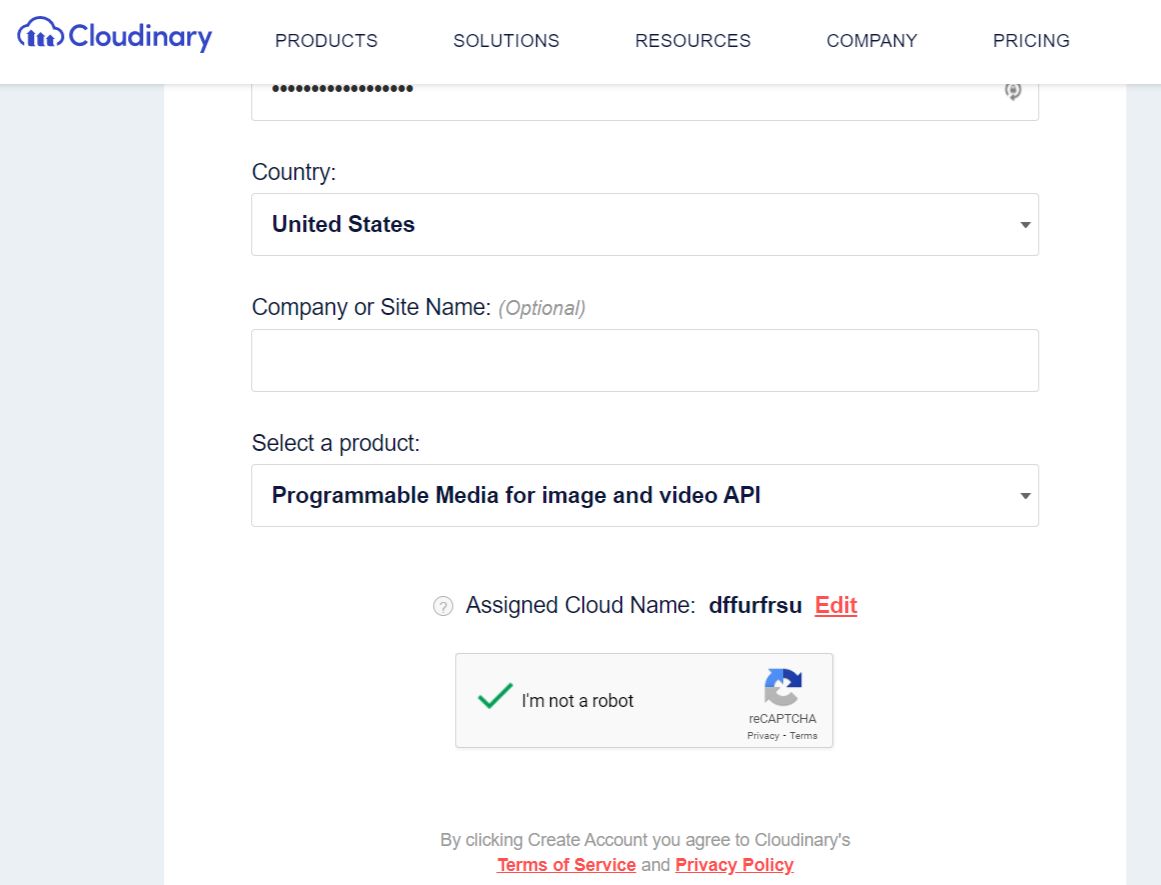
After you have signed up for a Cloudfinary account, you will need to check the email address for a validation email, and then you will be able to start integrating your Cloudinary / WordPress implementation:
The Cloudinary plugin will add a new admin menu item:
Cloudinary > Setup
Cloudinary + WordPress site setup step #3
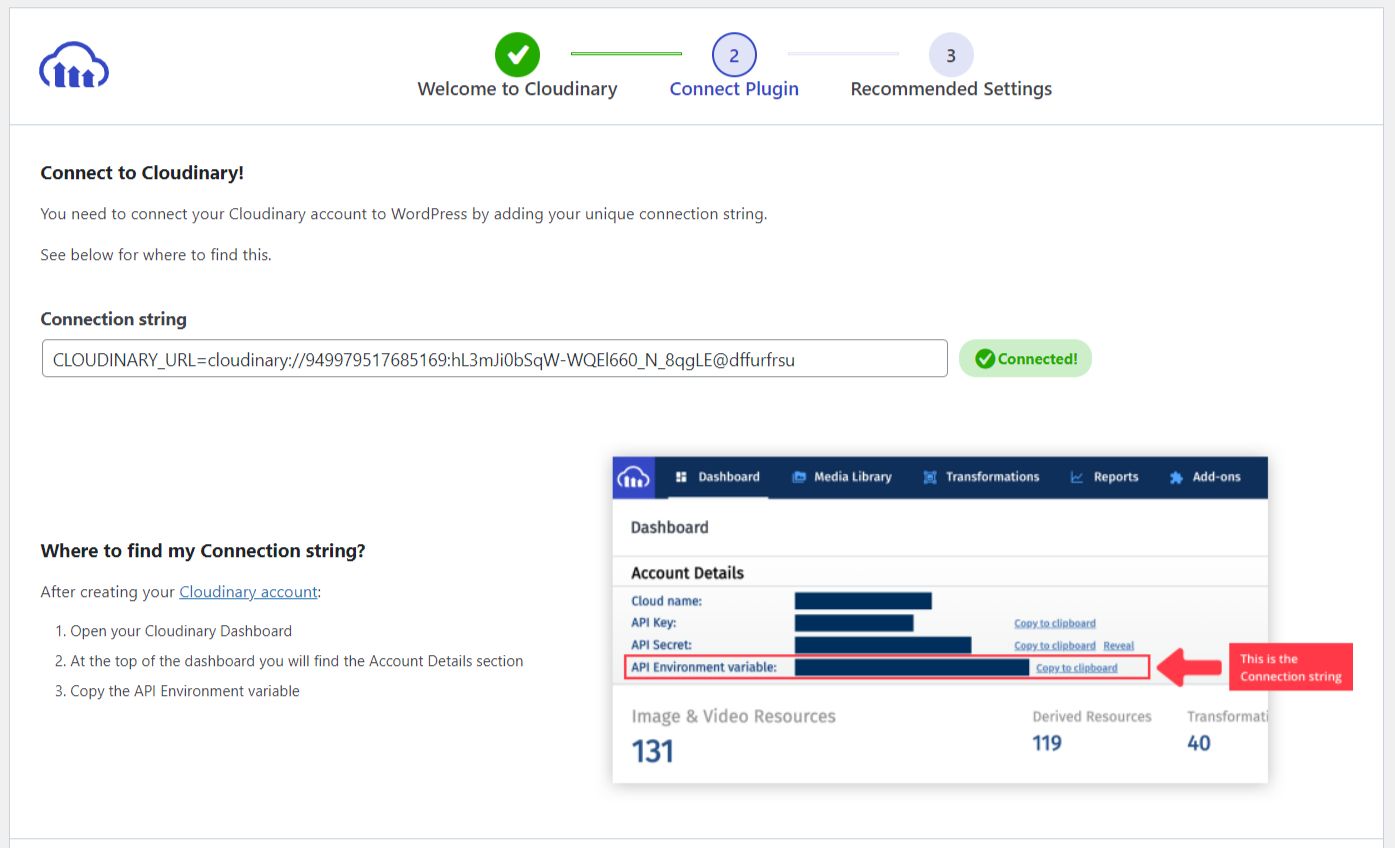
Go to the dashboard in your Cloudinary account and copy over the API environment variable into the plugin's settings and then follow the steps:
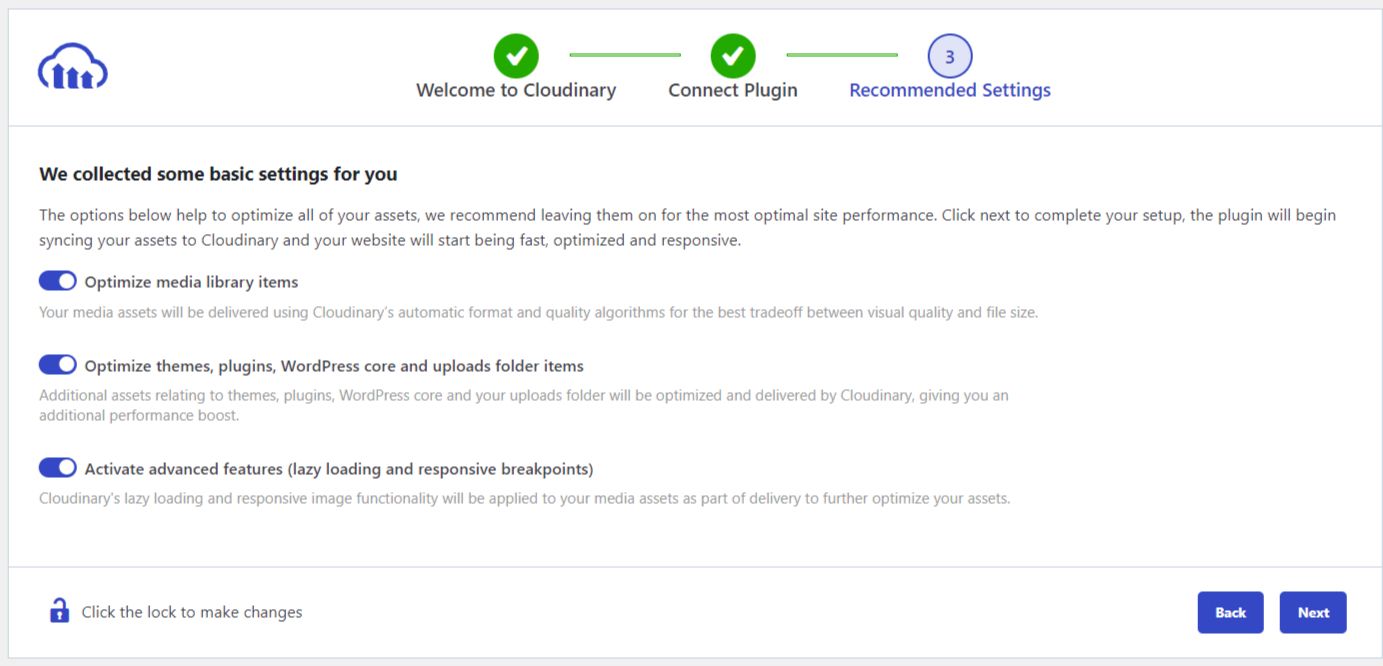
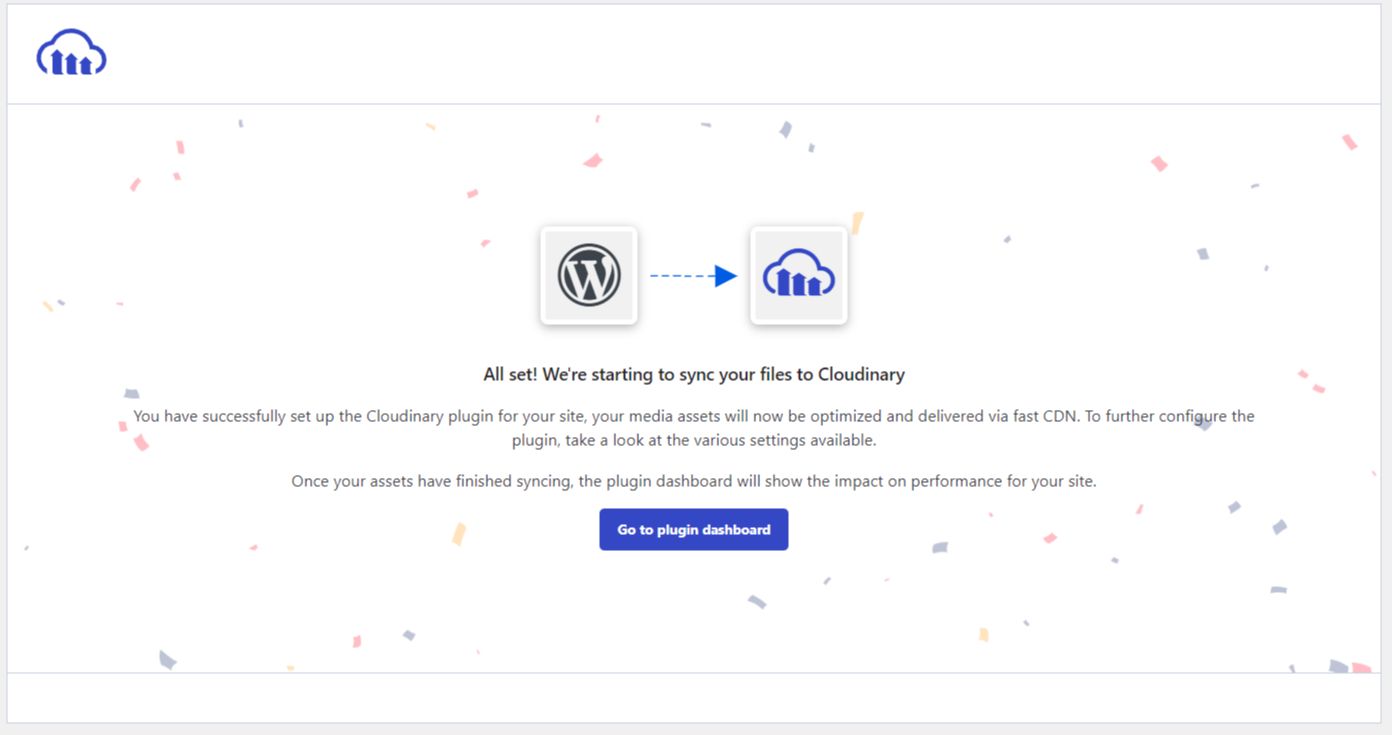
Cloudinary + WordPress site setup step #4
After your Cloudinary + WordPress setup has been integrated into your site, the existing images in the media library will be uploaded and synced to your account automatically.
Cloudinary will set several of your default setting, including general settings, image settings, video settings, lazy loading, responsive images, and gallery settings.
In the image settings of the Cloudinary WordPress plugin, you can set which image format should be served to site visitors along with image quality. The default settings will set both to be automatic so that you do not have to deal with which images would be supported on the browser for the visitors to your site.
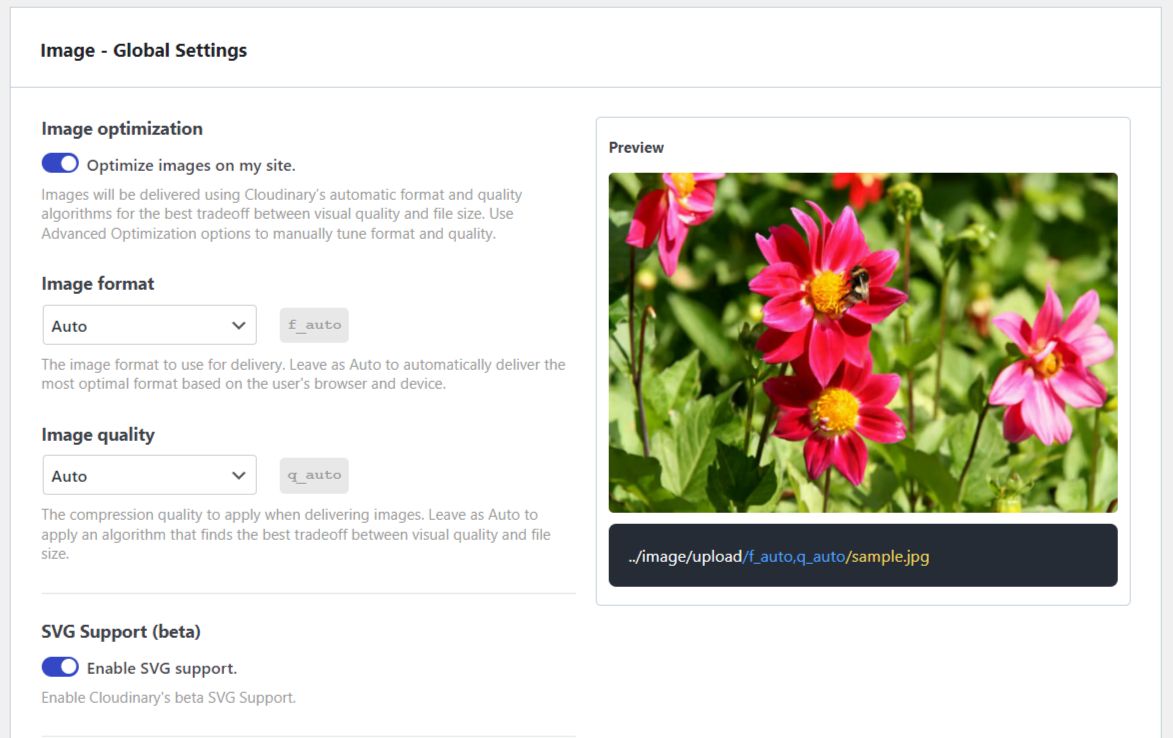
The default settings for lazy loading will enable the pixel threshold for which lazy loading should be enabled. Preloading animation would be enabled by default, and you can set the color that should be used for that feature. The type of placeholder generation can be set with values of blur, pixelate, the dominant color, and vectorize.
Cloudinary + WordPress site setup step #5
It is also possible to replace the default WooCommerce gallery with the Cloudinary product gallery on product pages if your site is using WooCommerce.
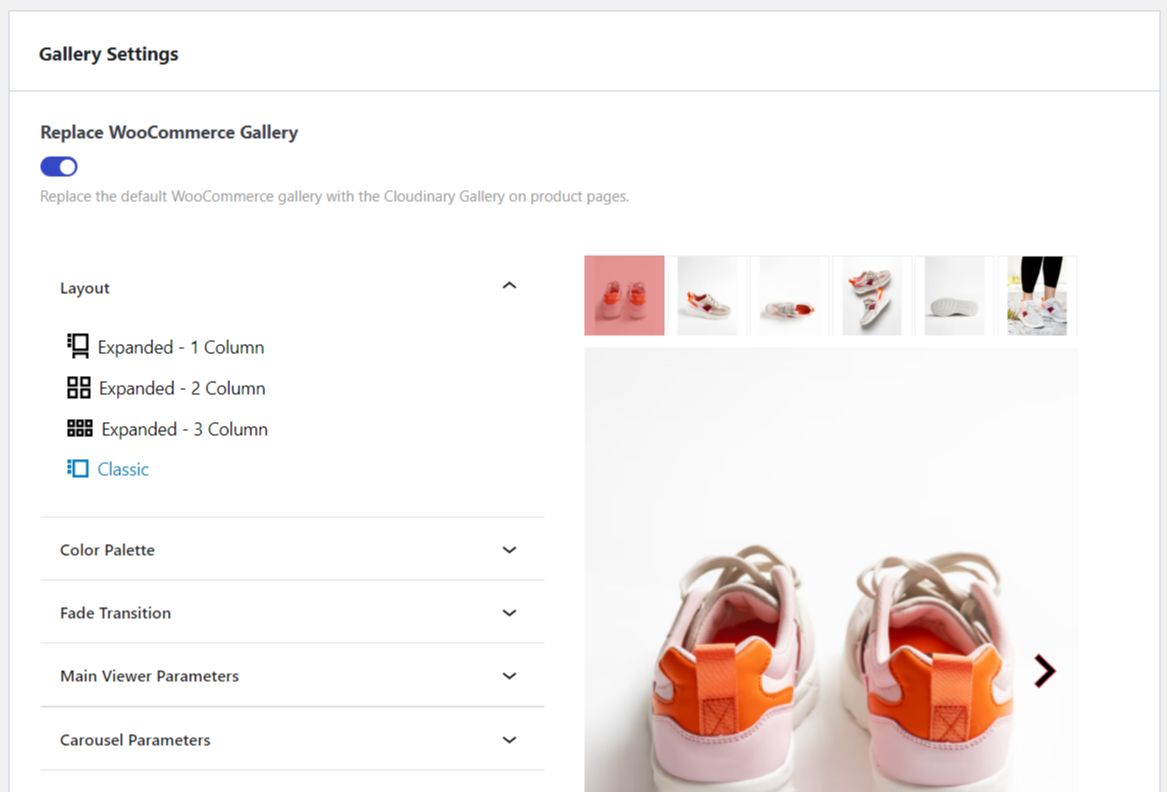
Cloudinary + WordPress site setup step #6
The Cloudinary WordPress plugin also includes two WordPress Command Line Interface (WP-CLI) commands, which can be used to analyze and sync:
wp cloudinary analyze
wp cloudinary sync
Cloudinary + WordPress site setup step #7
The Cloudinary connection string can also be set as a constant in your site's wp-config.php file. This method would be used if you wanted to avoid anyone being able to easily change out the Cloudinary settings.
Cloudinary + WordPress — helpful resources
We've put together a list helpful resources to help you with your Cloudinary + WordPress configuration effort:
- https://cloudinary.com/documentation
- https://cloudinary.com/documentation/wordpress_integration
- https://cloudinary.com/documentation/wordpress_developers#wp_cli
- https://cloudinary.com/documentation/wordpress_developers#setting_the_connection_string_as_a_constant
- https://wordpress.org/plugins/cloudinary-image-management-and-manipulation-in-the-cloud-cdn/
- https://cloudinary.com/products/media_experience_cloud
- https://cloudinary.com/documentation/media_optimizer_quickstart
- https://cloudinary.com/documentation/dam_digital_asset_management
- https://cloudinary.com/documentation/image_optimization
- https://cloudinary.com/documentation/video_optimization
Cloudinary + WordPress —conclusion
Consider using Nexcess for your WordPress cloud hosting, which includes a custom in-house CDN with easy plugin integrations. We offer the one-click staging site creation feature to test out content changes, new plugins, and theme changes.
You have a can choose your plugin update options either by using the auto-update feature in WordPress core for plugins and themes updates, using the version management module in the Solid Security Pro plugin, or using the Solid Central plugin for being able to manage multiple sites.
Build your business on WordPress
WordPress hosting at Nexcess is speedy, secure, scalable, and with more PHP workers than any other hosting provider.
If you want visual regression testing for your plugin updates, then you can use the visual compare feature for site plugin updates. The plugin performance monitor feature will give you valuable insights into which plugin changes and changes on your site that may be causing performance issues on the front end of your site.
If your site is using WooCommerce, then you can benefit from using the sales performance monitor which will help you be alerted when sales drop on your site in wp-admin and in site emails.
If you have any questions that need to be answered, please check out the Nexcess Knowledge Base.
Excellent WordPress hosting from Nexcess
Elevate your WordPress hosting provider choice with a trusted professional in the space.
At Nexcess, our technology platform expands to match your business growth.
Recent articles
- Migration guide: transfer a Squarespace domain to Nexcess
- Migration guide: transfer my Wix website to Nexcess
- How to customize the Nexcess MAPPS MU (must-use) plugin

